I have created this blog in an attempt to provide a place for teachers and parents of children with special needs to find positive strategies that promote academic, social and emotional growth. I believe in early intervention and in positively addressing both the challenges and strengths of students with disabilities.
Showing posts with label strategies. Show all posts
Thursday, December 4, 2014
Satin Hands and an Intervention....Strange Combination
I never used to need lotion for my hands. However, ten years ago, I started teaching my varying exceptionalities pre-k class and I found myself washing my hands 100 times a day. And let's face it....school soap is not gentle on your hands.
About that time, I discovered Satin Hands from Mary Kay and could probably have been their poster child. (I'm not a Mary Kay consultant, I just happen to really like this product.) The ladies that I work with found out how much I like it, and it is now a frequent gift for me during the holidays and at my birthday. So now, I actually have a set a home and at school.
Little did I know that my Satin Hands would become an intervention this year!
I have a little girl in my class who tends to scratch her arms when she perceives work as being too difficult. It can be pretty bad on occasion and she has picked scabs and opened old scratches. Bleeding in the classroom is not a good thing! Interrupting reading groups or math groups 3-4x every week to deal with bleeding is also not a good thing.
One day, I was using the lotion while she was at my table and she asked me what it was. I told her it was lotion and asked her if she wanted a little squirt. She said yes and "mmm, smells good." Then I got my bright idea. If she likes the smell and the feel of the lotion, maybe we could replace her scratching behavior by asking for some lotion. I asked her if she would like to do that and of course she said yes. So I told her she could use the lotion but she was not allowed to scratch.
I now have a tube of lotion at my reading table. She still sometimes starts to scratch in moments of academic frustration, but with a simple verbal prompt of "Mary, do you want some lotion?" She will stop and gently rub her arms. We haven't had a bleeding episode since we started. It is MUCH easier and less distracting to give her a quick squirt of lotion than it is to deal with washing, drying and band-aiding arms when she scratches and draws blood.
Sunday, October 28, 2012
Sight Word Writing
This sight word strategy is truly an example of how good ideas just keep getting passed along and how many children can benefit from one teacher's great idea.
I have two children who are in second grade and reading at an end of kindergarten level this year. They need a lot of practice with phonemic awareness skills and sight word mastery. At this point, they have been exposed to the district curriculum materials so many times; they really need something new. I'm always keeping my eyes open for them.
A friend of mine who is a kindergarten teacher was telling me she uses this strategy in her classroom. She got it from another teacher on her team, who in turn got it when she and a group of teachers were working on literacy centers. Wow! How many times has it been passed along? How many kids are learning because of it? I love that aspect of teachers sharing ideas!
It's very simple. You take a piece of plastic window screen (can be purchased at Home Depot) and cut it approximately 10 x 13. Then you use electrical tape to tape off the edges on both sides. Finally, use a blank sheet of paper or a simple typed up sight word worksheet and some crayons so children can practice writing their sight words "bumpy style."
I have put this in some TEACCH task baskets for these two boys. I'm also thinking of making some more and adding it to my Daily 5 Working with Words choices.
Sunday, October 14, 2012
Reading Interventions
While browsing on Pinterest, I found this incredible resource from Jen Jones on Teachers Pay Teachers. (It's free!) It is a table that pairs a reading problem a teacher may observe with several reading intervention ideas that can address it.
The ideas are all tried and true strategies we have all probably already used at some point in our teaching careers. I love this aspect of the document. We are not reinventing the wheel, we are thinking critically and planning systematically to address a problem.
Click here to check out Jen's If / Then Reading Interventions Menu.
The ideas are all tried and true strategies we have all probably already used at some point in our teaching careers. I love this aspect of the document. We are not reinventing the wheel, we are thinking critically and planning systematically to address a problem.
Click here to check out Jen's If / Then Reading Interventions Menu.
Tuesday, September 6, 2011
Reading Throughout the Day
Some of you know I've recently switched teaching pre-schoolers with disabilities to teaching third grade students with disabilities.
In Florida, third grade is a "high stakes grade level." Children who do not pass the reading section of our achievement test face a mandatory retention.
My assistants and I are working diligently to help our students develop and improve their reading skills. We have a few systems and procedures that we have in place to help our students maximize reading opportunities throughout the day.
In this post I'll list our systems and procedures, and then in future posts, I'll explain in more detail how we specifically address each item.
1) Guided Reading Groups led by the teacher using district adopted curriculum materials (for my district this is Harcourt StoryTown)
2) Scripted Phonics lesson led by a classroom assistant using SRA Reading Mastery materials
3) "Book Buckets" that include individual leveled readers from ReadingA-Z and a reading log. Update: In December of 2011, we added some chapter books to this time. For more information, see this post.
4) Sight word practice. We store this in our book buckets and simply write targeted a sight word on an index card, hole punch it and collect them on a binder ring.
5) Shared poetry using poems from curriculum materials and other supplements.
6) Shared reading focusing on robust vocabulary and focus skills such character, setting, recalling details, etc.
7) Accelerated Reader using individualized goals and reading levels.
8) Read aloud chapter books.
9) Read aloud grade level short stories led by a classroom assistant.
10) Reading "choice time" activities (popular songs with lyrics..karaoke style, Boggle, Boggle Jr, Spell It Puzzles, Bananagrams, Scrabble, Scrabble Jr, etc).
* For more details on how steps 1, 2, 6 and 9 look in the classroom, visit this post.
We've just started our third week of school and I feel as if we are really starting to move with our reading groups and instruction. It took us a bit of time to finish assessments, formulate groups, and teach our students procedures for each of the areas we've attacked.
Hopefully, by the end of the year, we'll be able to report some good growth in our students' reading skills. I say "we" and "our" with intent because it require a team effort between the students, their families, my assistants and me!
In Florida, third grade is a "high stakes grade level." Children who do not pass the reading section of our achievement test face a mandatory retention.
My assistants and I are working diligently to help our students develop and improve their reading skills. We have a few systems and procedures that we have in place to help our students maximize reading opportunities throughout the day.
In this post I'll list our systems and procedures, and then in future posts, I'll explain in more detail how we specifically address each item.
1) Guided Reading Groups led by the teacher using district adopted curriculum materials (for my district this is Harcourt StoryTown)
2) Scripted Phonics lesson led by a classroom assistant using SRA Reading Mastery materials
3) "Book Buckets" that include individual leveled readers from ReadingA-Z and a reading log. Update: In December of 2011, we added some chapter books to this time. For more information, see this post.
4) Sight word practice. We store this in our book buckets and simply write targeted a sight word on an index card, hole punch it and collect them on a binder ring.
5) Shared poetry using poems from curriculum materials and other supplements.
6) Shared reading focusing on robust vocabulary and focus skills such character, setting, recalling details, etc.
7) Accelerated Reader using individualized goals and reading levels.
8) Read aloud chapter books.
9) Read aloud grade level short stories led by a classroom assistant.
10) Reading "choice time" activities (popular songs with lyrics..karaoke style, Boggle, Boggle Jr, Spell It Puzzles, Bananagrams, Scrabble, Scrabble Jr, etc).
* For more details on how steps 1, 2, 6 and 9 look in the classroom, visit this post.
We've just started our third week of school and I feel as if we are really starting to move with our reading groups and instruction. It took us a bit of time to finish assessments, formulate groups, and teach our students procedures for each of the areas we've attacked.
Hopefully, by the end of the year, we'll be able to report some good growth in our students' reading skills. I say "we" and "our" with intent because it require a team effort between the students, their families, my assistants and me!
Tuesday, February 1, 2011
Play based writing
I have found a lovely, photo based blog entry on supporting writing skills through a play based curriculum.
Check it out. Jenny's preschool classroom writing experiences (indoors and outdoors) are fantastic!
Let the Children Play
Check it out. Jenny's preschool classroom writing experiences (indoors and outdoors) are fantastic!
Let the Children Play
Tuesday, October 5, 2010
Cheap! Dinosaur Measuring and Science
In the current economy (and as far as being frugal and financially wise at any time!) I am always interested in lessons that can be enhanced as cheaply as possible.
My class has been involved in a inquiry based unit on dinosaurs for the past week. It seems to me that there are always easy ways to integrate language and literacy lessons in every unit, but sometimes it is more difficult to integrate math and science. Since this unit focuses on dinosaurs, science is not a problem either, but how can we integrate math concepts? Here's one idea we used.
I found these dinosaur figures at my local Dollar Tree. (Yes, it cost a whopping $1 for this lesson.)

I explained to my students that these dinosaurs were supposed to get bigger when we put them in water. We decided to measure them with a ruler, predict how big we thought it would get and then measure it after it grew.

Since I wanted to focus on some math skills, we made a big deal out of measuring the dinosaur. I left my finger on the number 4 after we measured and reminded the children that he should get "bigger." I asked them "How big do you think he will get?" as I ran my other pointer finger across the top of the ruler (showing them the most logical choices across the ruler.) They made their predictions as I recorded them and then we observed. The pictures show you where we are so far!

After we measure our dinosaur again tomorrow, we'll take him out of the water and predict what will happen. It will be interesting to see if any of the children will predict that he shrinks back to 4 inches (remember, that's where we started at our first measurement!)
My class has been involved in a inquiry based unit on dinosaurs for the past week. It seems to me that there are always easy ways to integrate language and literacy lessons in every unit, but sometimes it is more difficult to integrate math and science. Since this unit focuses on dinosaurs, science is not a problem either, but how can we integrate math concepts? Here's one idea we used.
I found these dinosaur figures at my local Dollar Tree. (Yes, it cost a whopping $1 for this lesson.)
I explained to my students that these dinosaurs were supposed to get bigger when we put them in water. We decided to measure them with a ruler, predict how big we thought it would get and then measure it after it grew.
Since I wanted to focus on some math skills, we made a big deal out of measuring the dinosaur. I left my finger on the number 4 after we measured and reminded the children that he should get "bigger." I asked them "How big do you think he will get?" as I ran my other pointer finger across the top of the ruler (showing them the most logical choices across the ruler.) They made their predictions as I recorded them and then we observed. The pictures show you where we are so far!
After we measure our dinosaur again tomorrow, we'll take him out of the water and predict what will happen. It will be interesting to see if any of the children will predict that he shrinks back to 4 inches (remember, that's where we started at our first measurement!)
Thursday, September 23, 2010
"Post It" Graphs
Here's a simple strategy that we use a lot in my classroom. I write each child's name on a post it. Then I write a question on a piece chart paper and usually add visual supports for each column of the graph. Below is a picture of our most recent graph:

I like to use the post it graphs for lots of reasons:
1) They help children learn literacy skills by reading their name and their peers' names.
2) They help children develop language skills by answering questions and making choices.
3) They help children develop task related skills and focusing skills because they are actively involved and then they physically get to place their own name on the chart.
4) They help children develop social skills by learning how to take turns and wait for their own turn.
5) They help children develop math skills as we count the number of votes in each column and discuss concepts of more, less and the same (equal).
6) They help children develop literacy skills by becoming part of our environmental print in the classroom.
7) They are quick and easy to prep for! That means I don't spend more time preparing the materials than it takes the children to actually engage in the activity.
I like to use the post it graphs for lots of reasons:
1) They help children learn literacy skills by reading their name and their peers' names.
2) They help children develop language skills by answering questions and making choices.
3) They help children develop task related skills and focusing skills because they are actively involved and then they physically get to place their own name on the chart.
4) They help children develop social skills by learning how to take turns and wait for their own turn.
5) They help children develop math skills as we count the number of votes in each column and discuss concepts of more, less and the same (equal).
6) They help children develop literacy skills by becoming part of our environmental print in the classroom.
7) They are quick and easy to prep for! That means I don't spend more time preparing the materials than it takes the children to actually engage in the activity.
Thursday, August 12, 2010
Counting Backwards and Subtraction
I'm working with a little girl who is learning how to subtract.

The touch math strategies were very successful in helping her learn to add, so we are continuing with those materials and cues. However, when she was learning to add, she
had already mastered the skill of counting up. She has not yet learned how to consistently and accurately count backwards from 20. So while she is learning the concept of subtraction with differences from 5 and manipulatives, we are also working on counting backwards from 20.

I created a simple power point that she likes to "play" when we practice. I have her manually click to forward the slides. You can download the manual click power point here. I also added an automatic slide transition for those of you who may want to use this in the classroom. You can download the automatic transition power point here.
In addition to using the power points during our tutoring session,
her mom is also helping her count backwards during the many opportunities to wait during the day. They count backwards in the grocery store line, while waiting for her brothers at baseball practice, while the microwave is heating something, while a DVD is loading, etc. She has found lots of times during the day to practice with her!

The touch math strategies were very successful in helping her learn to add, so we are continuing with those materials and cues. However, when she was learning to add, she
had already mastered the skill of counting up. She has not yet learned how to consistently and accurately count backwards from 20. So while she is learning the concept of subtraction with differences from 5 and manipulatives, we are also working on counting backwards from 20.

I created a simple power point that she likes to "play" when we practice. I have her manually click to forward the slides. You can download the manual click power point here. I also added an automatic slide transition for those of you who may want to use this in the classroom. You can download the automatic transition power point here.
In addition to using the power points during our tutoring session,
her mom is also helping her count backwards during the many opportunities to wait during the day. They count backwards in the grocery store line, while waiting for her brothers at baseball practice, while the microwave is heating something, while a DVD is loading, etc. She has found lots of times during the day to practice with her!
Wednesday, July 29, 2009
Easy Adaptable Books
Patrick at Teaching All Students has a great description about how to make an easy adaptable book for your students. Check it out.
Sunday, July 12, 2009
Tips for Addressing Challenging Behavior
The University of Minnesota has a website that has great Tip Sheets for addressing challenging behavior in the classroom.
I particularly like the ones on "choice making" and "requesting a break." These are two very powerful strategies that can be embedded into almost any learning task.
Tuesday, June 30, 2009
Word Bank and Writing Strategy
This summer I have been working with a group of kindergarten through third grade students who have autism. Several of the students have writing goals that need to be addressed and all of them have expressive language goals that need to be addressed. If you have read any of my previous posts, you know that I am a big fan of digital photos to build play skills, critical thinking skills and oral language skills.
Since I find the digital photos so beneficial, I decided to pair that strategy with a manipulative word bank in the hopes of having my students build sentences that they would copy to create a simple paragraph. My goal was that they would build one topic sentence and two detail sentences. We started with modeling and a lot of physical prompts, but I'm hoping the level of prompting will decrease.

Here's what we did:
1) I printed several photos featuring sea life from www.flickr.com.
2) Each student chose a picture that we glued to a large sheet of construction paper.
3) The students were given a file folder with a word bank targeting words that made sense with their picture. (I met with their SLP and we color coded the post its to correspond with the colors and word categories that they already use on their manual communication boards based on Gail Van Tatenhove's system.)

4) Then the students built a sentence by moving the post its to a sentence strip (the sentence strip is just length of file folder cut down).
5) Next the students copied their sentence on a pre-cut piece of paper. (I did this to to visually define the space of the sentence for them. This way the letter spacing and formation is confined to an area that already "looks" like a sentence. )
6) Then they glued the sentence to the piece of construction paper to which we had previously glued their photo choice.
7) We cleared off the sentence strip and started to build another sentence and repeated the steps.
Here's what our first writing samples look like:
Since I find the digital photos so beneficial, I decided to pair that strategy with a manipulative word bank in the hopes of having my students build sentences that they would copy to create a simple paragraph. My goal was that they would build one topic sentence and two detail sentences. We started with modeling and a lot of physical prompts, but I'm hoping the level of prompting will decrease.
Here's what we did:
1) I printed several photos featuring sea life from www.flickr.com.
2) Each student chose a picture that we glued to a large sheet of construction paper.
3) The students were given a file folder with a word bank targeting words that made sense with their picture. (I met with their SLP and we color coded the post its to correspond with the colors and word categories that they already use on their manual communication boards based on Gail Van Tatenhove's system.)
4) Then the students built a sentence by moving the post its to a sentence strip (the sentence strip is just length of file folder cut down).
5) Next the students copied their sentence on a pre-cut piece of paper. (I did this to to visually define the space of the sentence for them. This way the letter spacing and formation is confined to an area that already "looks" like a sentence. )
6) Then they glued the sentence to the piece of construction paper to which we had previously glued their photo choice.
7) We cleared off the sentence strip and started to build another sentence and repeated the steps.
Here's what our first writing samples look like:
Tuesday, June 9, 2009
Water and Sea Life...Bloom's Box

A few years ago I was in a class that focused on differentiation and levels of knowledge. One fo the strategies the instructor shared was to create a "Bloom's Box" for assignments related to an organizing theme.
A Bloom's Box helps the teacher ensure that s/he is providing instruction at both the lower levels of understanding and at the higher levels of thinking. Essentially, a table is created labeled with each level of Bloom's taxonomy and assignments are sorted into appropriate categories. It helps the teacher make sure there is a balanced experience for all learners.
I'm going to use my Bloom's Box this summer for our Water and Sea Life Unit I have planned.
You can download my Bloom's Box here.
The following is just a list of the activities included in my Bloom's Box.
Knowledge
Students will name pictures of different bodies of water. (river, lake, pond, ocean, waterfall).
Students will name pictures of actions people can do with water (wash your hands, brush your teeth, take a bath, swim, play at the water table, drink, water plants, wash cars, ski, snorkel, boating).
Students will name pictures of sea life (sea star, shark, fish, stingray, jellyfish, manatee, urchin, sea anenome, dolphin, crab, lobster).
Comprehension
Alive/Not Alive Chart
Students will sort pictures of various familiar objects, people, animals and plants on a t-chart according whether the picture is something that is alive or not alive.
Comprehension questions
Students will answer “wh” about familiar stories and classroom activities.
Wants/Needs Action Chart:
Students will sort pictures of previously learned action words into categories of actions we need and actions we want to do.
Application
Class Aquarium
After reading the no-fiction trade book, “What’s It Like to be a Fish?” using Boardmaker icons and pictures, students will create a list of items needed to create a classroom aquarium.
Class Hermit Crab Habitat
After reading the book “A House for Hermit Crab,” using Boardmaker icons and pictures, students will create a list of items needed to create a hermit crab habitat.
Analysis
Compare and Contrast
Students will compare and contrast the homes of a sea creature of their choice with their home using Boardmaker icons, pictures and a pre-made Venn Diagram.
Compare and Contrast
Students will compare and contrast what we used to make our fish aquarium and what we used to make our hermit crab habitat using Boardmaker icons, pictures and a pre-made Venn Diagram.
Synthesis
Students will use supplies generated from their lists to assemble our class aquarium.
Class Hermit Crab Habitat
Students will use supplies generated from their lists to assemble our class hermit crab habitat
Evaluation
If I could be…
Students will draw a picture of any sea creature they would want to be. They will dictate which animal they chose and why they chose it.
Water Hole
Before reading the ending to the story, students will predict what will happen to the animals and the plants if it never rains again.
Personal Needs:
Students will draw a picture of any sea creature they would want to be. They will dictate which animal they chose and why they chose it.
Water Hole
Before reading the ending to the story, students will predict what will happen to the animals and the plants if it never rains again.
Personal Needs:
Students will predict and dictate responses of what would happen if we didn’t have water to wash our hands or brush our teeth.
Monday, May 25, 2009
Reading Activities for the Summer
Wednesday, April 15, 2009
I'm Thinking of a Word....

My pre-k students love this "game."
I start off by saying, "I'm thinking of a word. See if you can use the clues to figure out what I'm thinking about" and then I proceed to give 3 or 4 clues about my word.
For example, one night I pulled into my driveway and there were two very large rabbits in my front yard. I took a picture of them and used it during circle time the following morning. I told my class, "I'm thinking of a word. My word is an animal with very long ears. It has a puffy tail. It likes to eat grass and carrots. My word begins with the /r/ sound."
The beauty of this simple strategy is that it can be used any time of the day and requires very little prep work. We have used toys in the classroom, pictures from our Jack Hartman Learning Letter Sounds song and book, or as an introduction to a new topic.
I'm thinking of a word requires children to think critically about the information they are receiving auditorily. This helps to sharpen their listen skills and their higher order thinking skills. Since it is presented in a game format, the kids enjoy the thinking process!
Tuesday, January 27, 2009
The Bamboo Story and Positive Behavior Support

I'm currently involved in an intensive Positive Behavior Support (PBS) training. Yesterday was the first day of our training and the facilitators were laying the foundation and the ideas that improving challenging behavior and creating a classroom climate for emotional literacy often takes a long time. There are no quick fixes.This reminded me of the Bamboo Story. A collegue gave me a copy of this story quite a few years ago. It was hanging behind my desk as a gentle reminder for my assistant and me. I have no idea what happened to it. It probably fell down at some point and accidentally got thrown away. I've tried to find the same story online, but to no avail. Here is what I remember and the message I took from the story I received so long ago.
The Bamboo Story:
Once upon a time there was a farmer who planted some bamboo seeds. Each day he diligently cared for his bamboo seeds in the hope that he would see the fruits of his labor in wonderful bamboo growth.
The first year passed with daily care. And yet nothing happened. No bamboo sprouted.
The farmer was undaunted. He continued his daily watering, weeding and care of his bamboo seeds.
The second year passed and nothing happened.
At this point the farmer was beginning to feel discouraged. He had consistently worked; nurturing and caring for his bamboo seeds, and yet he saw no growth.
The third year passed and suddenly his bamboo was growing a foot each m
onth. By the end of the year his bamboo was over 12 feet tall! Finally, the farmer had evidence of his growth.
onth. By the end of the year his bamboo was over 12 feet tall! Finally, the farmer had evidence of his growth.So the question is, did the bamboo grow 12 feet in that final year when the growth was evident and measured? Or did the bamboo grow 12 feet in 3 years through the daily care?
It is said that during the first two years the bamboo IS growing. It is said that the bamboo is growing roots below the ground that are a foundation strong enough to support the future growth spurt. It is said that growth was occuring as the farmer was caring for the seeds, the farmer just couldn't see it.
My recent training in PBS strategies made me think of this story again. Often it takes a long time for children with challenging behaviors to demonstrate skills of regulating their own behavior, resolving conflict or problem solving.
So as we begin our journey with positive behavior support, we as teachers must persist as the farmer did. Continually providing the daily care and nurturing of
our students' emotional literacy. Those students may leave our classrooms without us seeing evidence of their growth. But perhaps, they grow by leaps and bounds one year. Perhaps those years of daily care including work on emotional vocabulary, directly and indirectly teaching social skills and providing support was a foundation for that growth. And perhaps the child's skills grew over the course of several years, but we just saw evidence of it in one.
our students' emotional literacy. Those students may leave our classrooms without us seeing evidence of their growth. But perhaps, they grow by leaps and bounds one year. Perhaps those years of daily care including work on emotional vocabulary, directly and indirectly teaching social skills and providing support was a foundation for that growth. And perhaps the child's skills grew over the course of several years, but we just saw evidence of it in one.Monday, January 12, 2009
Block Play

Today was a great day. Not only did I get to hear Ron Clark speak this morning, but this afternoon, my assistant and I actually finished a project that has been on our to do list for two years. Hooray for us!
We have have been wanting to create a book that will provide visual support for children playing in the block area.


We have a few students who have difficulty figuring out what to do and how to play in the block area. Often one of us will play with the students and help them make choices and decisions. But just as frequently, we are working in other areas of the classroom and students are independently playing in the block area. By creating the book, we are hoping to make the area more accessible to more students.


We started off with the resource book "Beyond Centers and Circle Time." There is an excellent section on "Construction Play" that includes an observation scale of simple to complex block structures.
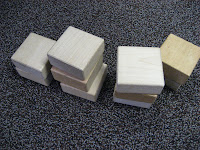
We used this scale to reproduce some similar structures using our classroom materials. We tried to create structures of varying complexity so that children of varying ability levels could use the idea book. We then took pictures with our digital camera and uploaded the images to a PowerPoint. The book was then printed, laminated, bound and placed in the block area. You can download our book here.
We also only used a few pictures within the book. The concept of the book is to help the child get started, not to dictate or direct his/her play. (The pictures on the right are a few that we used in the book.)
Since we haven't used it yet, I'll have to update you on the level of success. Hopefully, we can teach our students how to use the book and then increase levels of self directed play and independence.
Saturday, January 3, 2009
File Sharing and Visual Supports
A few people have mentioned that they are interested in seeing some of the resources that my friend Shannon and I used when we presented our workshop session at the Florida Council for Exceptional Children Conference.
I have uploaded a few of them at 4shared.com.
FCEC Visual Supports PowerPoint
Instructions for Make It/Take It items.
First/Then
Independent Goal Templates
Rule Board
I have uploaded a few of them at 4shared.com.
FCEC Visual Supports PowerPoint
Instructions for Make It/Take It items.
First/Then
Independent Goal Templates
Rule Board
Wednesday, December 17, 2008
Visible Thinking
I learned about creating visible thinking routines at an early childhood International Baccalaureate conference I attended in 2007. I immediately saw the value of these routines and slowly began to implement some of them with my pre-k students. In a nutshell, using a visible thinking routine structures a lesson so that children can make connections and reach higher levels of thinking about a given topic.
Hands down, my favorite visible thinking routine is I See, I Think, I Wonder. This routine encourages students to make observations and connect their thinking and questions to the observations they have made.

I have created some very simple visual supports with Boardmaker software that I tape to chart paper to create a chart to record student responses. I laminated the visuals so that I can re-use them and simply tape them to a piece of chart paper. I draw lines to create three columns and I am ready to record.
I then choose a prompt. Sometimes it is a poster, sometimes it is a page from the story we are reading and sometimes it is a set of objects that we will using to create something. I set the stage and then guide the conversation according to the routine. "Raise a quiet hand if you can tell me something you see." "Sally saw a gray cloud, raise a quiet hand if you can tell me what that makes you think." "I see a gray cloud and I think it might rain, I wonder...."
Sometimes, I don't even do a "formal" lesson with this strategy, I just model it and encourage it within conversation. For example, my fish tank in the classroom was getting algae growth on the sides. While the students were napping, I ducked off campus to pick up a "sucker fish" from our local pet store. When I came back, I put the fish in the bag, in the fish tank so it could acclimate to our water temperature. It was also a natural prompt to generate conversation and thinking when the students woke up and saw it. I just followed the thinking routine guiding their comments and observations. What do you see? What does that make you think? And then finally modeling a wonder statement (which tends to be most difficult for my students) "I wonder if our tank will change?" and encouraging them to wonder also. They watched as we opened the bag and let the fish into the tank and then we started all over again.
Hands down, my favorite visible thinking routine is I See, I Think, I Wonder. This routine encourages students to make observations and connect their thinking and questions to the observations they have made.

I have created some very simple visual supports with Boardmaker software that I tape to chart paper to create a chart to record student responses. I laminated the visuals so that I can re-use them and simply tape them to a piece of chart paper. I draw lines to create three columns and I am ready to record.
I then choose a prompt. Sometimes it is a poster, sometimes it is a page from the story we are reading and sometimes it is a set of objects that we will using to create something. I set the stage and then guide the conversation according to the routine. "Raise a quiet hand if you can tell me something you see." "Sally saw a gray cloud, raise a quiet hand if you can tell me what that makes you think." "I see a gray cloud and I think it might rain, I wonder...."
Sometimes, I don't even do a "formal" lesson with this strategy, I just model it and encourage it within conversation. For example, my fish tank in the classroom was getting algae growth on the sides. While the students were napping, I ducked off campus to pick up a "sucker fish" from our local pet store. When I came back, I put the fish in the bag, in the fish tank so it could acclimate to our water temperature. It was also a natural prompt to generate conversation and thinking when the students woke up and saw it. I just followed the thinking routine guiding their comments and observations. What do you see? What does that make you think? And then finally modeling a wonder statement (which tends to be most difficult for my students) "I wonder if our tank will change?" and encouraging them to wonder also. They watched as we opened the bag and let the fish into the tank and then we started all over again.
Subscribe to:
Posts (Atom)