Showing posts with label visual cue. Show all posts

Saturday, September 12, 2020

Covid19 Adjustments for Preschool Housekeeping Center

 We have just finished our first two weeks of school with all of our new re-opening policies for safety, disinfecting, and social distancing.  It's tough!  Last year I started my preschool special needs class with 15 students and ended my year with 17.  This year with all of our new policies, I am so thankful for lower numbers.  We currently have 7 children in the classroom and 4 remote learners that I teach concurrently through zoom lessons for circle time, small groups and therapies.

My last post showed the adjustments we made for our block center.  This center worked great from day one!  The reduced choices, the reduced visual "clutter" by removing the ABC rug, and simple visual supports from the painters tape and Lesson Pix symbols really helped this center to be successful.

Our housekeeping center is functioning well after two weeks of adult support.  Remember, my district has a policy for limiting shared materials, disinfecting after each use, all students must wear masks, and we must attempt to social distance to the best of our ability.  The housekeeping center isn't great for social distancing!  The kids naturally want to play together and be in close proximity.  Most years, this is exactly what we are hoping for, however, as we all know, this year is a bit different.  I wanted the kids to continue to have opportunities for pretend play and natural conflict resolution, but I still have to adhere to my district policies.

We decided to remove the small table and chair set that we typically would have in the housekeeping center.  This created more floor space for distancing.  We also removed many of the props including all of our dress up clothes.  We decided to limit the center to 2 children (typically we would have 4 children playing here) and set up the center as a "store" for our first few weeks.  We have two shopping carts, two cash registers, two sets of keys, and sets of food.  We have enough these categories of toys to either disinfect quickly after each use or rotate toys with our rotation system.


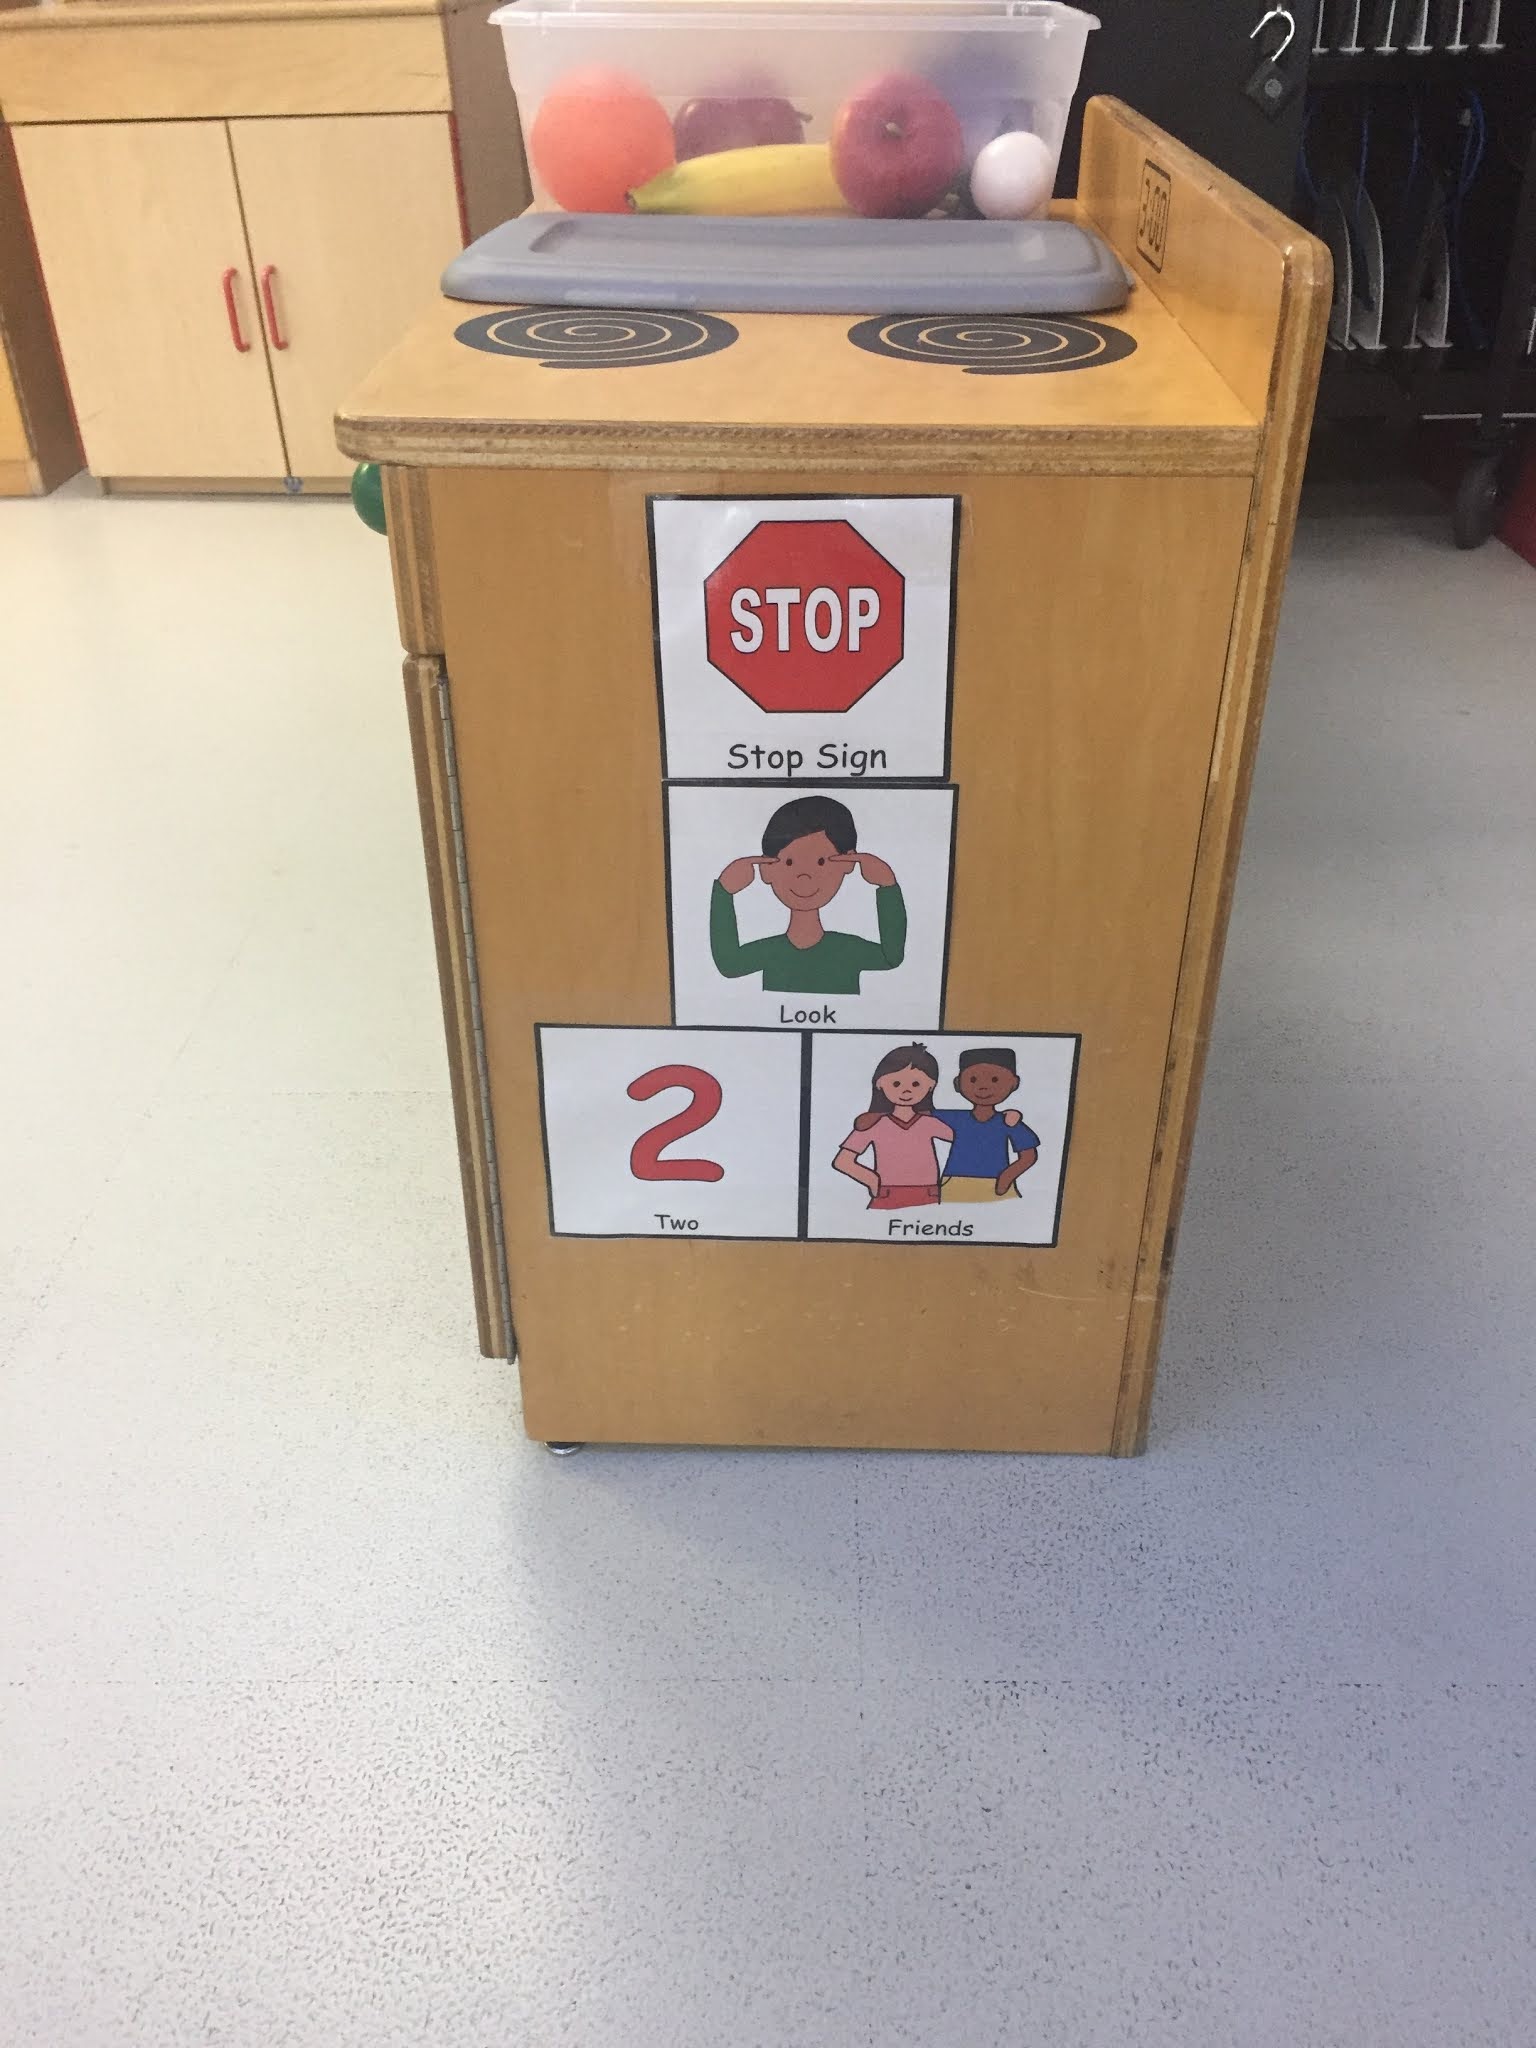


It took a LOT of support initially and I still don't love it.  But at this point, I have not figured out a different way to provide the students with the play opportunities and adhere to the district guidance plan.  So I can live with it.  The students are playing, they are talking and solving problems through the "trade" solution, the "timer" solution, and the "wait and take turns" solution.  Our "solution board" visuals can be found for free at the CSEFEL site under their practical strategies section.  I'll show photos of this in another post!  At this point in time, I feel like this option is at least allowing us to continue with developmentally appropriate play and natural opportunities to work on our social emotional goals.

Saturday, August 29, 2020

Covid19 Adjustments for Preschool Block Center

 As I was setting up my classroom this year, I felt as if I were a beginning teacher.  There were so many new issues to think about and plan for.  One of the things that was central to my planning was figuring out a safe way for my young pre-k students to continue to have opportunities to play!

In my district, any child over the age of two must wear a mask when on a school campus.  My students are all ages 3-5, so this includes my class.  We also are required to meet social distancing requirements to the greatest extent possible.  This was the biggest challenge in planning my center time this year.

I have referenced the TATS site, my district's guidance plan and of course my knowledge of the benefits of visual supports and the importance of developmentally appropriate practice.  My students start Monday, so this is not kid tested yet!  I may come back next week with a new plan.


In previous years, I had a colorful ABC carpet in this center and would typically have enough materials and space for 4 children to play productively.  This year I rolled up the carpet and am storing it because I felt like it would be too visually distracting.  We have reduced the amount of blocks and supplemental toys in the center and have reduced the center to two students.  I want the students to learn a new procedure of entering the center, so I wanted the visuals and the painters tape to be prominently seen. 

The materials in the center are two bins of lightweight foam blocks and some cars and trucks.  One child will be able to play on one side of the painter's tape while another child can play on the other side.  This is not supporting cooperative play, but at this moment, it was the best I could come up with and still meet the social distancing guidelines I must adhere to.

I chose the foam blocks over the unit blocks because I have a ton of them!  I also chose them because our toy storage rotation system is on top of cabinets and it will be much easier to lift the lightweight foam blocks than the heavy wooden unit blocks.  

My current plan is to only allow the two children who choose blocks to play with these toys.  When they are finished, they will go in a laundry bin to be sprayed with our disinfectant and then sit out of the rotation for 3 days.  If the student does not want to stay in blocks for the entire center time, he or she will be able to choose another available center, or chose a personal play bucket that we set up for each child.

I will post more pictures on the toy rotation system we are planning, other centers, and the individual play buckets later!


Thursday, June 11, 2015

Simple Visual for Change of Schedule

Sometimes students just need to "see" how the changes of a schedule will affect them.

During our standardized testing window, specials and lunch changed school-wide, which prompted a change in my reading and math blocks.  I had one student this year who mainstreamed for a large portion of the day, but she started her day with me to organize her schedule and any known changes, and then returned to me in the late afternoon.  Under normal circumstances, she knew when she would have time to "hang out with her BFF."

Although she is very bright, she didn't "see" when she was going to be able to have time with her best friend within all of our schedule changes.  This particular child is very high functioning on the autism spectrum and we have found that often writing things down helps her process information.  She was quite anxious about the multiple schedule changes and started to move into her "whiny" voice. This is usually a pre-cursor for more intense behavior (throwing books, tipping chairs, yelling), so if we can catch her during the "whine," we can usually prevent the major meltdowns.

I loved this intervention because it was "quick and dirty."  There is nothing pretty or fancy about it, but we completed it in about 3 minutes during our morning check in and it resolved her anxiety. When she started to whine about when she was going to have time with her friend, I simply asked her, "Would you like me to write down both afternoon schedules so you can see when you have time together?"  She said yes and then added her comments on when they could "hang out."

Quick and simple but very effective!


Thursday, September 4, 2014

Accountable Talk

As my reading instruction continues to evolve over the years, I keep adding new strategies to my "bag of tricks."  It's funny how I get ideas.  (Honestly, I very rarely have a completely original thought when I start to figure out a new strategy or a lesson I haven't implemented before.)  I recently told a first year teacher that one of the greatest gifts a teacher can have is to be a good synthesizer.  If she can learn to take all of this overload of information we are bombarded with and somehow synthesize it together and use it when it's appropriate and useful; then she will be able to continually add to her bag of tricks.

I'm adding to my bag of tricks.

For the past few years my 1st-3rd grade students have loved having "Nacho Karaoke" day once a month.  On the day the cafeteria serves nachos, I let them all eat in the classroom and we sing karaoke to songs with lyrics that I have saved from YouTube.

I'm reviewing my list of songs before this year's first Nacho Karaoke and was re-introduced to the song "Brave" by Sara Barielles.


As I paid attention to the lyrics, I really noticed the refrain this time: "Say what you wanna say.  I wanna see you be brave!"

I thought this would be a great way to introduce "Accountable Talk" to my students!  For the past few years, it's been challenging to teach children how to agree or disagree with a peer based on text evidence.  It can be hard to raise your hand and speak up during a group, especially if you are disagreeing with a friend.  However, when students DO engage in accountable talk, I have found that they truly start to engage with each other and the text in a purposeful and meaningful way.

My class has already set our essential agreements (rules) including one that states "We will be kind to each other."  With that as a foundation and also practice of the roles of "speaker" and "listener,"  I think we can use this song to talk about how important it is to speak up and "say what you wanna say" during an accountable talk discussion time.

Sunday, August 31, 2014

Fair vs. the Same

This summer, I came across this visual on Pinterest. To me, this shows why we assess and plan for individual differences for our students.

What is FAIR is not always the SAME thing for everyone. At the beginning of the school year, my class has a meeting and we generate our class rules. We call these "agreements" (and sometimes for little kids I call them "promises.") The students agree to follow the rules we generate. Then my assistant and I make agreements with the class too. One of our most important agreements is to help make things fair.

I find the concept of fairness to be one that even my youngest three year olds could understand. When the adults promise to be fair, it sets the stage nicely for differentiating your lessons according to your data. When someone asks me why something is different for one person or one group, I simply reply "Because I promised you all that I would help make things fair; and you have what you need right now, and so do your friends."

Clearly the boy who is tall doesn't need a box to stand on (even if he wants one) and clearly the child who is the shortest needs 2 boxes if he is going to be able to see the game. What is fair, is not always the same thing for everyone.


My Pinterest link led me back to this post by Phil Artman. He found it on Facebook and could not determine the original writer.  If it belongs to you and you do not have a "noncomercial share alike" aspect to it, please leave a comment and I will remove the post.

Saturday, January 4, 2014

Writing Haikus

Way back in 2009, I worked with a friend of mine who is an SLP to devise a manipulative word bank to help my summer school students with autism generate their own sentences and write a simple paragraph.  It sounds pretty straightforward, but it was actually quite a bit of work for me because I had never had to provide quite that level of support for students.  You can read about it here.

This year, I used this strategy again.  While my current students, don't have the severe needs of the class I developed the system for, I thought it would be helpful for some of them.

We were working on a unit that focused on different forms of poetry.  One of the lessons for the general education students at grade level was to write a haiku.  I wanted my students to do this too.  So I stole some ideas from my general ed teacher friends and then added some supports to them.  Here is what we did:

1) Each student painted a background of mixed colors with yellow and orange.  My assistants and I used our Elison machine to cut out some "bare trees," spiders, and leaves.  The kids used the black shapes to glue a scene to their previously painted background.  (Sorry I don't have a picture of this! I'll see if I can update this with a "fake" one that I make so you can see what I"m talking about.)

2) As a whole group we looked at the pictures that were created and generated a word bank of words that described our pictures.  I wrote them on the board and the kids copied them.  We also reviewed the rules and syllable pattern for creating a haiku.


3) Two of my students were able to generate their haikus after completing these activities, others needed some more help.

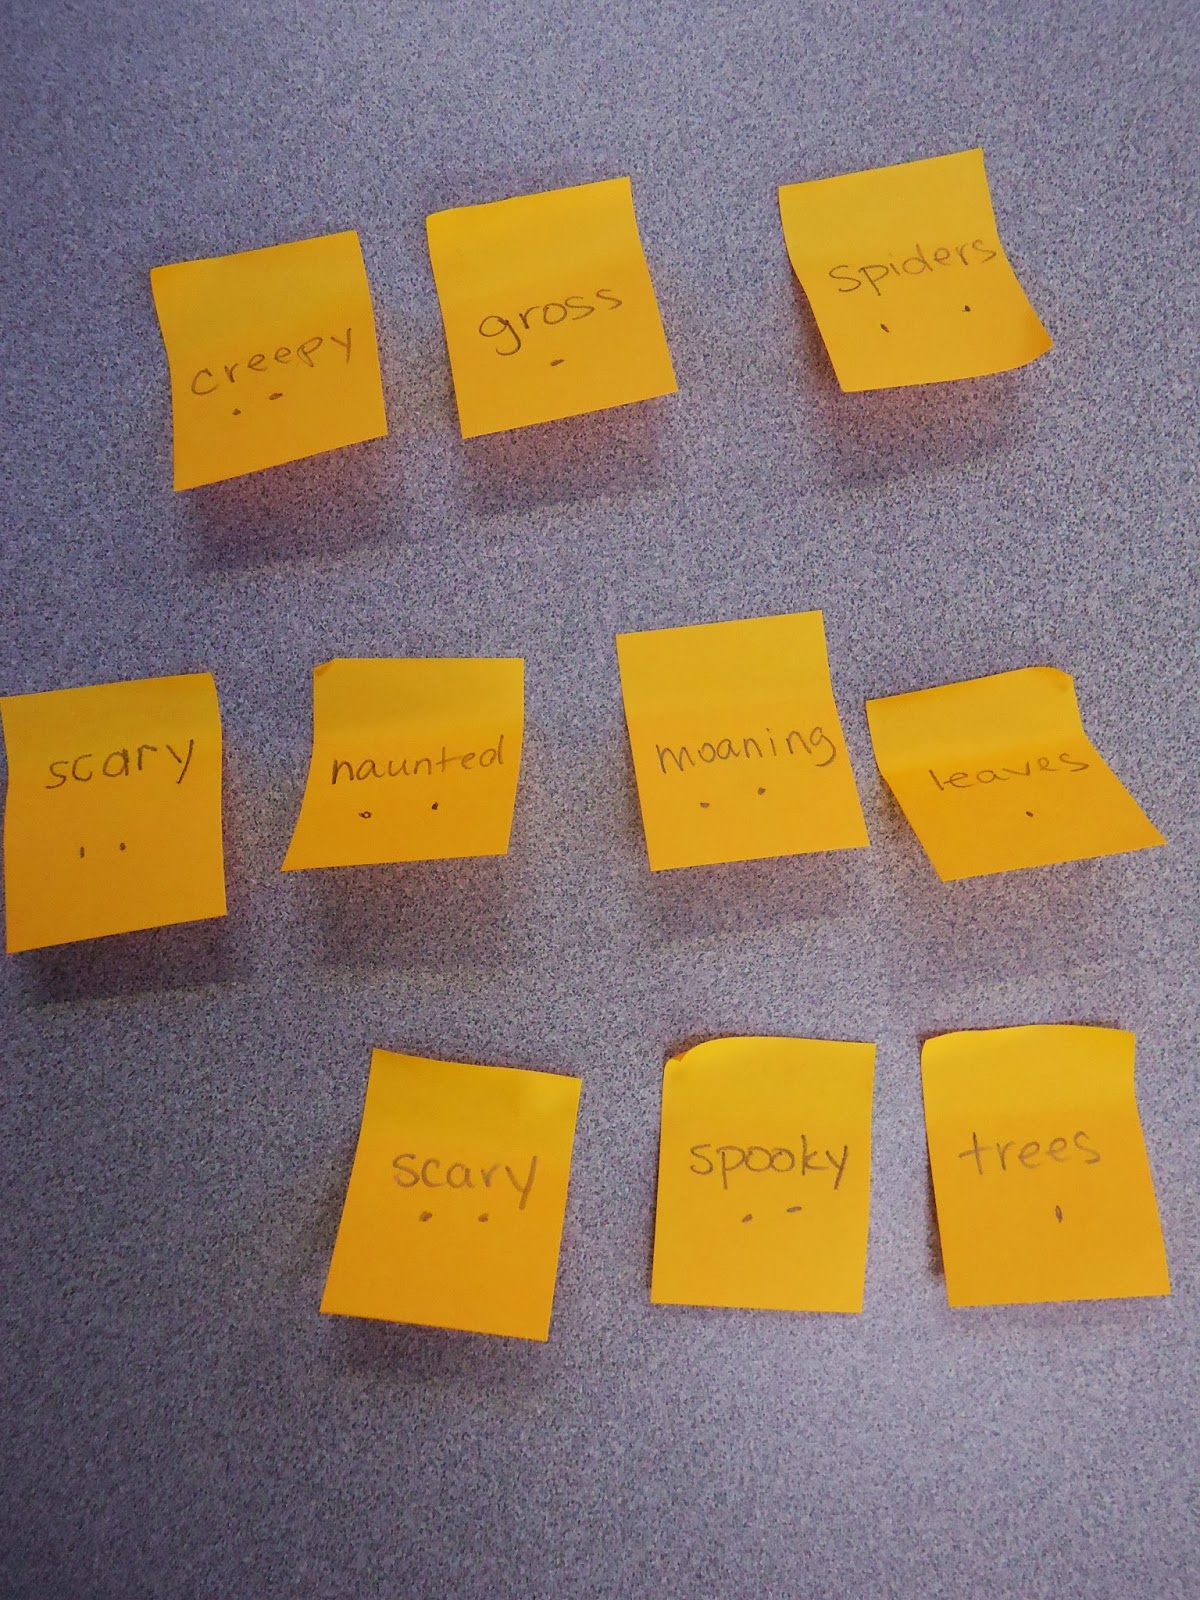
4) I transferred the word bank to post it notes and put dots underneath each word to identify how many syllables the word had.


4) The students moved and manipulated the words to create a phrase that made sense and also fit the syllable pattern for a haiku.


5) When they finished writing their haiku, they read it to me and I typed it on the computer.  We printed their haiku and they used craft scissors to cut the edges of the paper the poem was printed on.  Then they glued their haiku to their picture and we hung it up for display!


When my general education team decided this was going to be one of the "published" pieces we would do for our quarter 2 writing grades, I was a bit worried.  Writing a haiku is very abstract.  I needed to find a way to teach the syllable pattern and the emphasis on nature to my students.  The art project and the post it notes (as well as previous experience with haikus we read aloud) helped them to successfully complete this! It's nice to be "pushed" into doing something that is a bit uncomfortable sometimes. (I never would have chosen haikus as a published writing sample.)   As a teacher, it made my brain stretch and think about how to make this lesson work with my students.


Tuesday, June 30, 2009

Word Bank and Writing Strategy

This summer I have been working with a group of kindergarten through third grade students who have autism. Several of the students have writing goals that need to be addressed and all of them have expressive language goals that need to be addressed. If you have read any of my previous posts, you know that I am a big fan of digital photos to build play skills, critical thinking skills and oral language skills.

Since I find the digital photos so beneficial, I decided to pair that strategy with a manipulative word bank in the hopes of having my students build sentences that they would copy to create a simple paragraph. My goal was that they would build one topic sentence and two detail sentences. We started with modeling and a lot of physical prompts, but I'm hoping the level of prompting will decrease.

Here's what we did:

1) I printed several photos featuring sea life from www.flickr.com.

2) Each student chose a picture that we glued to a large sheet of construction paper.

3) The students were given a file folder with a word bank targeting words that made sense with their picture. (I met with their SLP and we color coded the post its to correspond with the colors and word categories that they already use on their manual communication boards based on Gail Van Tatenhove's system.)

4) Then the students built a sentence by moving the post its to a sentence strip (the sentence strip is just length of file folder cut down).

5) Next the students copied their sentence on a pre-cut piece of paper. (I did this to to visually define the space of the sentence for them. This way the letter spacing and formation is confined to an area that already "looks" like a sentence. )

6) Then they glued the sentence to the piece of construction paper to which we had previously glued their photo choice.

7) We cleared off the sentence strip and started to build another sentence and repeated the steps.

Here's what our first writing samples look like:

Saturday, January 3, 2009

File Sharing and Visual Supports

A few people have mentioned that they are interested in seeing some of the resources that my friend Shannon and I used when we presented our workshop session at the Florida Council for Exceptional Children Conference.

I have uploaded a few of them at 4shared.com.


FCEC Visual Supports PowerPoint


Instructions for Make It/Take It items.

First/Then

Independent Goal Templates

Rule Board

Wednesday, August 6, 2008

Interactive Books

As I am preparing for a new school year, I have been thinking about what resources and materials I use on a weekly basis that could be easily shared.

I love to use interactive books and visual supports. I find that my students attend to the lesson and remain engaged for longer periods of time when a lesson is structured in a supportive manner.

One of my all time favorite sites for interactive books and visuals is the Speech-Language-Hearing Services of Jefferson Parish Public School System.

Here are a few tips to find great printable materials from the site:

Check out the AAC button (Augmentative/Alternative Communication).
The home page of the AAC button has many interactive books that you may download for free. This page requires the user to own a Boardmaker CD.

If you don't own Boardmaker, make sure to click on the Adapted Stories button. This is a group of shared materials that can be printed directly from the website. Under the Fall tab, I have printed, laminated and velcro-ed the Going to School book. I usually use this book during the first week of school. This was the first book I printed from this site....after using it in my classroom, I was hooked. I've printed, laminated and velcro-ed many more since.

For those of you who are new to interactive books or maybe just looking for more ideas on how they are used in the classroom, check out the Photos of Activities button. This section gives a photo of the finished interactive book and other classroom materials that the teacher used with the lesson.

Also be sure to look for the Lang Activities button. This button has many, many Power Points designed to increase language skills.

I use the Power Points as a "sponge activity" when students are bathrooming and washing their hands. My classroom is set up with an Active Board (an interactive white board). I use the Power Points on my Active Board, but you could also use them with a projection screen or connect your computer to a TV.

This year I think I'm also going to try using the Power Points with our computer buddies. We have a general education 4th grade class that visits us once a week to work on the computers. My school has a student drop on our server. I'm going to try uploading the targeted Power Point to the student drop and have the 4th graders download it to the student computers. Then they can read through the power point one on one with their partner. After they finish that, they will be able to chose an online game that supports the skill. I'll let you know how it goes!

Happy exploring and navigating the site.....it is such a wealth of ideas and resources.

Monday, May 19, 2008

Classroom Procedures: Continuation of the Benefits of Daily Routines

In two previous posts, The Benefits of a Daily Routine and Entrance Procedures we discussed the importance of establishing, teaching and maintaining classroom routines and procedures. A routine or procedure is different than a rule in that it teaches a student the steps to complete a task. (i.e. The line up routine teaches students the steps to successfully line up.) Harry Wong is an advocate for only a few classroom rules (i.e hands and feet to self) but supports the widespread use of many classroom routines/procedures.

The following list are some of the routines that I find important and useful. While I cannot give specific advice on how to structure your classroom procedures without knowing details about your class dynamics, your physical layout and your school rules; I can offer some guiding questions that may help you to determine routines for yourself. I can also give examples of routines that I use and you can modify them to fit your teaching situation.

Bathroom
When can students go?
When do they need to wait?
What will I do for students who need help?
Where do they wash and dry hands?
Where is the trash can?
How do I get custodial help for accidents?
Have I shown respect for all students?

My procedure for K-2: Students could go to the bathroom anytime during the following: morning work, independent work, centers, recess, snack or lunch. They were not allowed to go during direct instruction time (i.e reading group, math group, writing). If they asked, I usually asked them if they could wait. Most frequently, they could wait. Sometimes they could not and I would let them go. However, if this became a pattern, then I began to think it was an escape behavior. I would then ask my (meticulously organized) assistant to help me remember to send them before instructional groups started.

Drinks

When can students get a drink?
When do they have to wait?
Is permission required?
How do they request permission?
When during the day can you schedule drinks in your routine?
Have I provided enough opportunities for hydration?

My procedure for K-2: Same procedure as bathrooming. Verbal reminders were given to students to get drinks after recess and physical education activities.

Pencil Sharpening
Provide an opportunity for students:
~during the first 15 minutes in the morning
~during choice time, independent work, centers


Teacher always has sharpened pencils available:
~at the teacher's table
~at the assistant's table
~on the counter for student use
Do I have a system in place to provide materials in a timely manner?

My procedure for K-2: I have to confess, this is one of my pet peeves. My procedure was created out of a need to maintain my sanity. Pencil sharpening is one the of the most distracting and irritating sounds for me. I hate it! No pencils are allowed to be sharpened during my direct instruction time. It is like nails on the chalkboard for me!


Students could sharpen pencils during the first 15 minutes of class or during center time. After that, if they needed a sharpened pencil they had to use one of mine or my assistant's. We always had pencils at our teaching tables and on a counter for students.

Line Up
Do I have a cue to tell students when to line up?
Is there enough physical space for all students to line up?
How will students move to line? (in groups, one at a time, all together?)
How will students know their place in line?
Will I have specific jobs? (line leader, door holder, light monitor)

K-2 procedure: We created a line order. The first person in line was, obviously, the line leader. The last person in line was the door holder. Each week the line leader went to the end of the line and the next person in line moved up. This allowed each child to have a turn at both jobs.

Visual tip: My husband introduced me to painter's tape. Painters tape is blue tape (easily found in the painting department of Home Depot and Lowe's) that does not leave a sticky, gooey mess (like masking tape does). I now use painter's tape as a visual cue on the floor to outline a shape for each child to stand on when lining up.

Transitioning to a new activity
What cue do you use to let students know it's time for a new activity? (timer, verbal cue, chimes)
How much time do students have to move to the next activity?
How do they know when to start the next activity?
How will they move (if required) to the next activity?

K-2 procedure: We transitioned to the next reading or math group according to a timer. When the timer beeped, it was time to move.

These are just some examples of classroom procedures that I have found to be beneficial. Teaching a procdure helps students to understand how you want them to complete a task. Procedures help students to be successful in the classroom and they help to maximize time on task by directly teaching expectations.